Overview
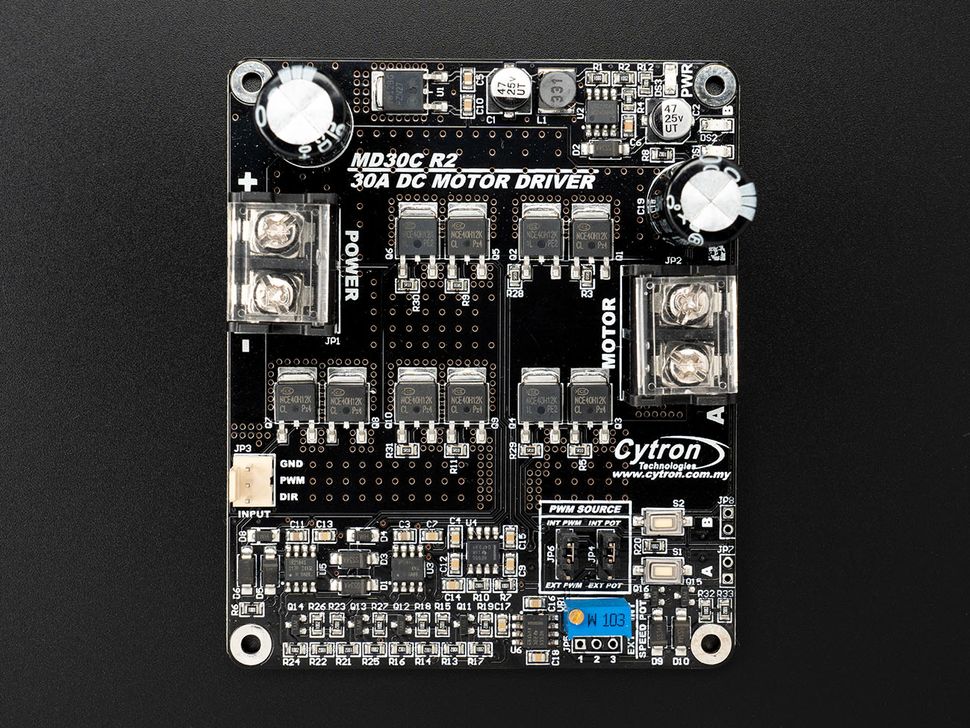
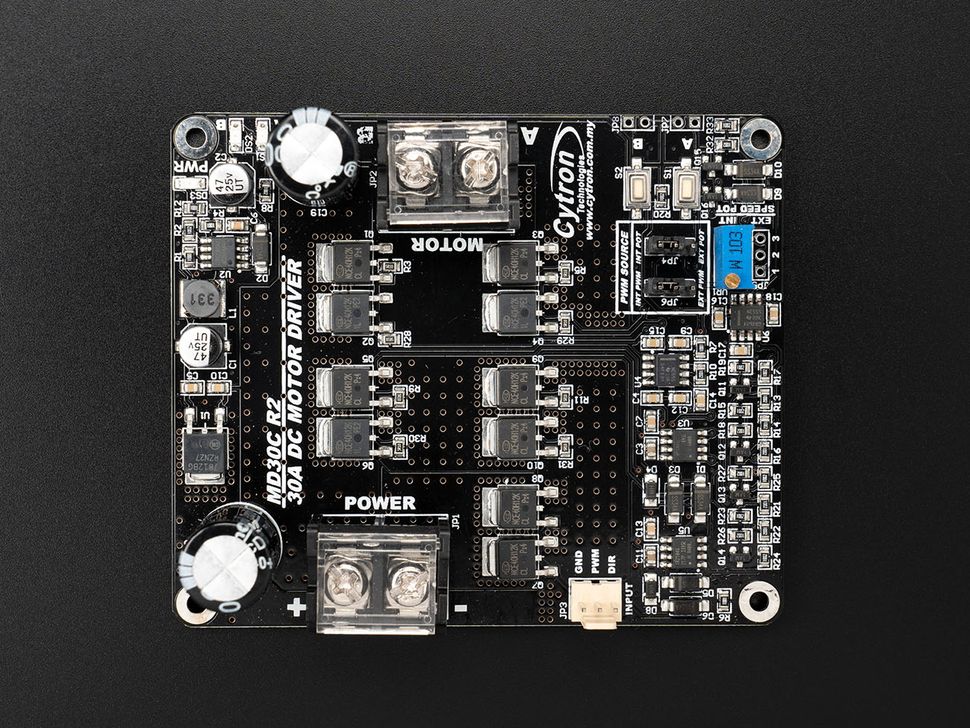
The Cytron MD30C R2 DC Motor Driver is a medium to high-power single channel driver for brushed DC motors. As the upgraded successor to the MD30B, it has the capability to handle up to 80A peak current for one second and 30A continuously. This driver is perfect for applications requiring reliable, high-power motor control without the complexity of additional cooling systems because of the solid state full NMOS design.
It supports a wide voltage range from 5V to 30V DC and is compatible with various logic levels from 3.3V to 5V, making it versatile for projects involving Arduino and Raspberry Pi.
Features
MD30C integrates an onboard control switches and potentiometer for standalone operation and support for both locked-antiphase and sign-magnitude PWM operation. Its full NMOS design ensures swift switching and optimal efficiency, making it an ideal for various high-performance applications.
- Voltage range from 5V to 30V DC.
- 30A continuous current and 80A of peak current for (1 second).
- Logic Level voltage range from 3.3 to 5V making it compatible with Rasoberry Pi boards and Arduino boards.
- NMOS bridge for better efficiency.
- PWM frequency up to 20KHz for speed control
- Motor Braking when PWM singal is pulled low.
- Onboard PWM generator, control switches and potentiometer for standalone operation.
- Support both Locked-Antiphase and Sign-Magnitude PWM operation.
Specifications
Key Specifications:
| Input Voltage | 5V to 30V DC |
| Current | 30A continuous |
| Peak Current | 80A for 1 second |
| Logic Level | 3.3V and 5V compatible with Raspberry Pi and Arduino |
| PWM Frequency | 20KHz |
| Polarity Protection | Yes |
| Test Buttons | Yes |
| LED indicators | 1 Power Indicator & 2 Output Indicators |
| Fan | No |
| Heat Sink | Not required |
| Dimensions | 93.98mm x 78.74mm |
Pinout
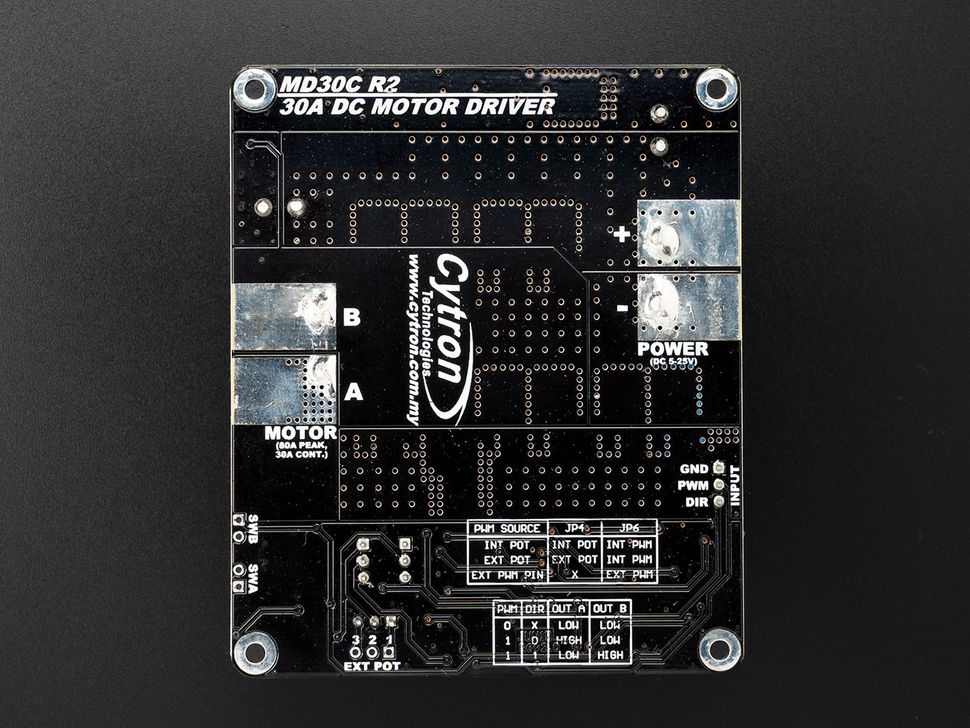
| A & B | Motor termial |
| Plus (+) | Connect to positive terminal of the battery*. |
| Minus (-) | Connect to negative terminal of the battery*. |
| GND | Ground |
| PWM | Motor PWM speed control input. NOTE: PWM is not "RC PWM" |
| DIR | Motor direction input. |
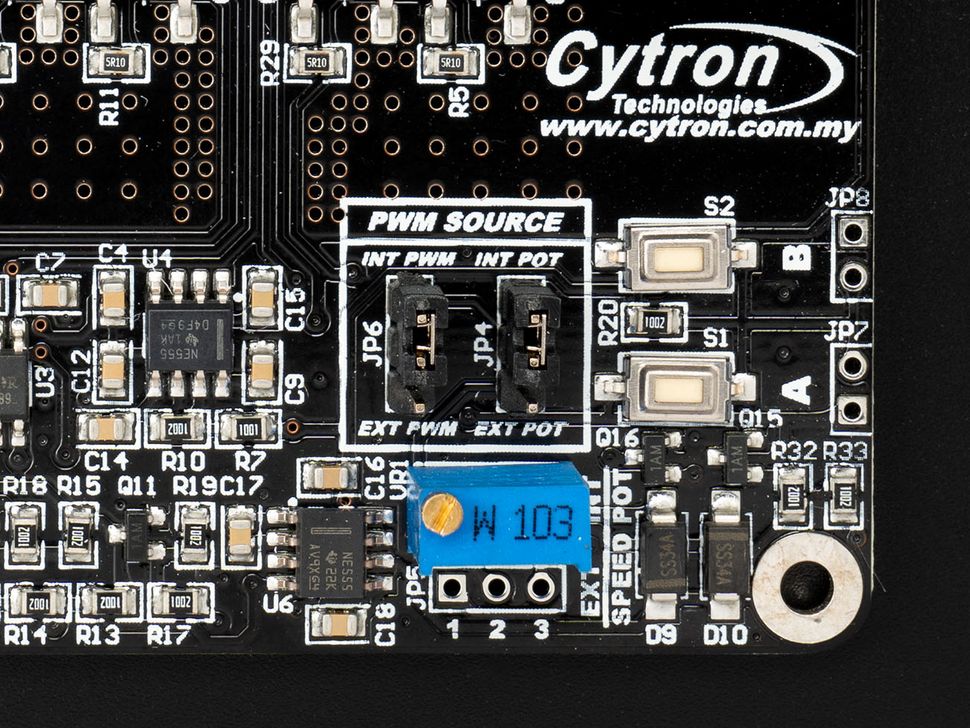
| JP4 | Jumper to switch between INT POT (Internal Potentiometer) and EXT POT (External Potentiometer). |
| JP6 | Jumper to switch between INT PWM (Internal PWM) and EXT PWM (External PWM). |
| JP5 | 3 Pin header to connect external 10K potentiometer. |
* When operating an inductive load, such as a DC brush motor, it's important to use a battery. This is because most power supplies, particularly those with a switching design, have a protection circuit that shuts down upon detecting regenerative current from the motor. In scenarios where a switching power supply is necessary, it's still suggested to connect a battery in parallel. This battery should have the same rated voltage as the power supply to effectively absorb the regenerative current.
Connections & Code
Power
- Plus(+)/ Minus(-): Connect it to a battery (5V to 30V DC)
- GND: Connect it to arduino board ground.
- Terminal A and B: Connect to Motor
Signal
Connections for Arduino UNO
- PWM: Connect it to pin D3
- DIR: Connect it to pin D4
Code
Before we move into coding, first we need to install the Cytron Motor Drivers Library written by Cytron Technologies in the Arduino IDE.
You can install this library by directly going to Tools > Manage Libraries which opens the Library Manager. In the library manager search for Cytron Motor Drivers Library using the search bar and click on the install button to install the latest version of the library.
After installtion go to File > Examples > Cytron Motor Drivers Library > select any one example.
We are using the example "PWM_DIR" from the example menu for the code below.
/*******************************************************************************
 * THIS SOFTWARE IS PROVIDED IN AN "AS IS" CONDITION. NO WARRANTY AND SUPPORT
 * IS APPLICABLE TO THIS SOFTWARE IN ANY FORM. CYTRON TECHNOLOGIES SHALL NOT,
 * IN ANY CIRCUMSTANCES, BE LIABLE FOR SPECIAL, INCIDENTAL OR CONSEQUENTIAL
 * DAMAGES, FOR ANY REASON WHATSOEVER.
 ********************************************************************************
 * DESCRIPTION:
 *
 * This example shows how to drive a motor using the PWM and DIR pins.
 * This example only shows how to drive a single motor for simplicity.
 * For dual channel motor driver, both channel work the same way.
 *
 *
 * CONNECTIONS:
 *
 * Arduino D3  - Motor Driver PWM Input
 * Arduino D4  - Motor Driver DIR Input
 * Arduino GND - Motor Driver GND
 *
 *
 * AUTHOR   : Kong Wai Weng
 * COMPANY  : Cytron Technologies Sdn Bhd
 * WEBSITE  : www.cytron.io
 * EMAIL    : [email protected]
 *
 *******************************************************************************/

 #include "CytronMotorDriver.h"


// Configure the motor driver.
CytronMD motor(PWM_DIR, 3, 4);  // PWM = Pin 3, DIR = Pin 4.


// The setup routine runs once when you press reset.
void setup() {

}


// The loop routine runs over and over again forever.
void loop() {
  motor.setSpeed(128);  // Run forward at 50% speed.
  delay(1000);

  motor.setSpeed(255);  // Run forward at full speed.
  delay(1000);

  motor.setSpeed(0);    // Stop.
  delay(1000);

  motor.setSpeed(-128);  // Run backward at 50% speed.
  delay(1000);

  motor.setSpeed(-255);  // Run backward at full speed.
  delay(1000);

  motor.setSpeed(0);    // Stop.
  delay(1000);
}
Opps
Sorry, it looks like some products are not available in selected quantity.


